Saturday 16 February 2013

Stepping out of my comfort zone....

Written by Linda Gauthier


This morning I woke up, feeling like I wanted to do something different, didn't know what, but I knew I'd figure it out.  Went through my normal routines, cleaning the kitchen, wiped down the shower, checked the fridge for any vegetables that have gone rogue. Talked to the cat about my dilemma, she wasn't very
forthcoming with any ideas; she only tipped her head and looked at me like I'd gone off my meds and promptly curled up and went to sleep.

So I went outside, checked my pond, took a tour of the garden to see what, if anything, was coming up.  Yup, bulbs starting to poke their heads out of the ground, maybe I should do some spring cleanup.  Decided to attack the side yard.  Pulled a bunch of weeds and fledgling dandelions, raked some leaves up, moved a couple of landscape bed retainers, then decided nope this isn't cutting it.  With mud clumps attached to my shoes, I clomped up the back stairs.  Now what?  A cup of tea, yup tea, that will fix it.

Hot cup of tea and a stack of cookbooks later, I decided I had found my quest -- I will try a new recipe, I am going to try making my own tortillas, the recipe looks easy, simple ingredients and it is described as delicious.  Why not?  I can do this and it is good to try new things, right?  


First, I better decide how I'm going to serve them.  Okay, I have chicken thighs, black beans, kidney beans and rice, homemade canned tomatoes.  South of the border here we come.  Ariba, Ariba taste treats are on the way. This recipe was created on the fly, with the inspiration being Black Beans and Rice.


Impromptu South of the Border Chicken Thighs

8 chicken thighs, boneless skinless
1 quart canned tomatoes
1 large tin black beans
1 large tin red kidney beans
1 pkg Epicure Enchilada mix
1 medium onion
1 large clove garlic
Salt and pepper
1 cup rice
1 bottle of pale ale

In my slow cooker I placed the Chicken thighs, tomatoes, Epicure Enchilada flavouring, 1/2 a bottle of pale ale beer, (why you ask? I don't know, just thought I'd try it) chopped onion and garlic, place temperature on high and cook for 2 hours,

Open slow cooker put beans in slow cooker.  Cook for another hour. 

Now add rice cook for 30 minutes more on high, lower temperature to low stir and place lid back on.

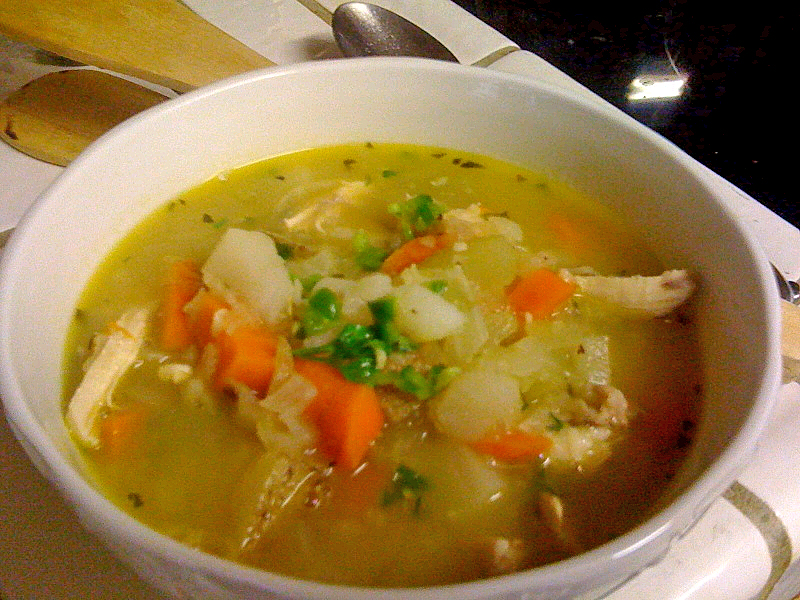
This made a substantial amount of food, enough that I can make a soup for tomorrow night's dinner, and even freeze a portion for a future dinner.  I like being able to do this, as it allows me flexibility in my menu planning when I have crazy days.  Tomorrow's post will have information and pictures about the soup and this week's menu.


Homemade Corn Tortillas 

Recipe from an article published by Jackie Dodd
Homemade Corn Tortillas


Ingredients

1 cup Masa
pinch salt
¾ cup water (she has also used beer, which turns out great as well she says)

Instructions

In a large bowl, add the Masa and the salt, stir to combine. 
Add the water and stir to combine. If the dough is too dry to hold together, add additional water. If it is too wet, add more Masa
Form into balls a bit larger than golf balls. 

She suggested using a tortilla press, however, I don't own one, so I used a rolling pin.  If you do have a press, her instruction on its use can be found at the bottom of this post.  The rolling pin worked well.


I layered them between parchment paper before cooking.

Heat a griddle (I used a cast iron skillet) to a medium high heat (about 350 for electric griddles). 

Cook until slightly brown on the bottom (about 30 seconds to a minute) flip and cook on the other side. Don’t overcook.

Serve warm, impress your friends.  (Her Words)

I served them with shredded lettuce, chopped tomatoes, diced red onion, homemade guacamole, and the chicken and bean mixture topped with pickled peppers and onions (canned this past summer).  It was well received by the family and was very filling, they ate 2nds and thirds I could only make it through 1 tortilla, not because I didn't enjoy it but it was just very filling.  I found the flavour of all the items together to be very good, and texture of the tortillas nice.  I think the bean mixture was a little thick, and could have been a little thinner but the flavour was nice.  I might not add as much rice next time, and I also believe the cooking time was a little long, but otherwise it was met with favorable reviews.


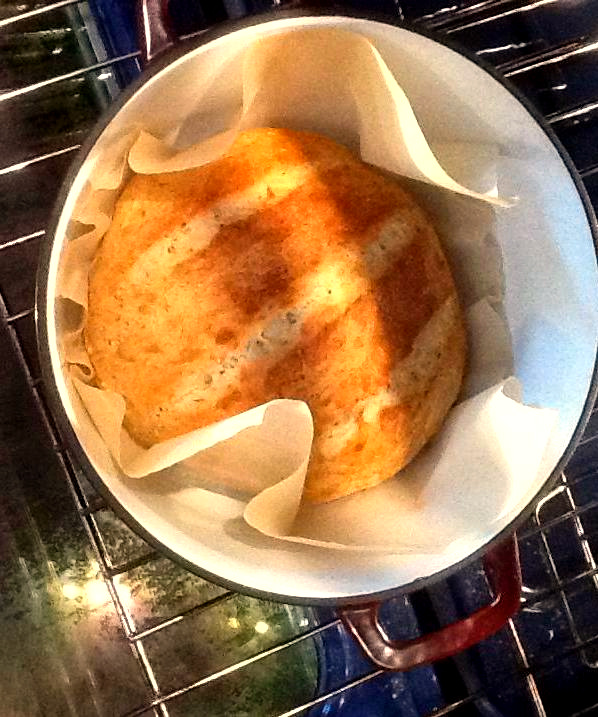
The outcome of my experience with this new recipe:

Well, it turns out this was not as easy as it appeared.  I found I had difficulty in getting the dough to stick together properly.  At first I found the dough too dry, then it didn't want to stick together or roll as thin as I wanted.  I was not able to make the tortillas as round as I wanted, but the flavour was good and they worked well for the dinner.   
The problem may have been with my masa, as I had it on my pantry shelf for a while it may have been too dry.  Or heaven forbid, it could have been a problem with the operator, and not the product!  I imagine there is a technique which I need to master, and I willbut for a first time attempt I was reasonably happy.

I will try this recipe and others again.  I believe it would be worth mastering, I can see all kinds of uses, and reasons why I would like to know how to do this, rather than buy the dry plain tasting tortillas from the grocery store.

Jackies' notes on using the Tortilla Press:


Prepare a tortilla press by wrapping in plastic wrap or covering with parchment paper
Place one ball in the center. Press, rotate and press again until thin.


To my way of thinking, the only way I'm going to improve my cooking skills and provide my family with a varied menu, is to explore different methods of cooking and to think outside the box.
I have been like this most of my life.  When I met my husband, he thought Kraft dinner and French fries was a balanced meal.  I remember one of the first times I was truly shocked by his eating habits, was when I had cooked him a special meal, which consumed most of my food budget for the week by the way, and he took one look at it, without even trying it, and announced "I don't like salmon or asparagus.  Do you want to go to McDonalds?"
I was furious.  I had poached a salmon fillet, made a hollandaise sauce from scratch, steamed asparagus, the first of the season, and made a beautiful salad, and poached pears in red wine to be served with Creme Fraiche.  To which he said "can we eat at McDonalds?"
I later found out he had never even tried neither Salmon or Asparagus.  

Thankfully, he has much improved and his tastes have become much more accommodating over the last 27 years, to the point where now he will "always try at least once", and I have made sure my children had a varied diet, so they would not hurt any young man or woman, who had put their heart and soul into a meal, only to be rebuffed for "McDonalds."
It never hurts to reach beyond our comfort zone, what is it likely to hurt?  You'll either find you like it, or it is not for you, but either way, you have added to your life's repertoire of experience.  Play, learn and enjoy cooking, it is a lot cheaper than going out to restaurants all the time to find a new taste treat.


Until next time, enjoy yourself, stop and smell the coffee and think about trying new things.  Smile, it saves you from getting wrinkles.                           


Thursday 14 February 2013

I'm in the dough again Bread Dough that is...

Written by Linda Gauthier


Love is caring for each other

Happy Valentine's everyone from the young at heart, to those who are just about to start out on this journey
This is what Valentine's day is all about.  Have a great day!!


Made my cousins Loretta's bread yesterday and the men in my household inhaled it.  I made homemade chicken soup and served it with the bread and it was yummy.  I made a big pot of Chicken stock to use and keep for the week.  I purchase necks, backs, wings from a local butcher who sells organic chicken, it makes the best chicken stock.  My basic stock is very simple and has a million uses.


Basic Chicken Stock

Chicken bones  ( I buy a large bag of soup bones from the butcher for about $3.50)
1 Med. Onion peeled and cut in 1/4's
2-3 Bay leaves
1 large clove of Garlic crushed
1 small bunch of Sage, Thyme, tied together and placed in pot
Peppercorns about 1/4 tsp
3 stocks of celery cut in 1/4s
2 large carrots cut in 1/4s
Salt to taste  I usually add this 1/2 way through cooking.
Place everything in a large Dutch oven, cover with water and put lid on ; bring up to boil, turn down and simmer.
I usually will let it simmer on low for several hours, until meat is falling off bones, bones have become quite soft.
Pour stock through strainer and cool.  Skim off any fat and then store in covered container until ready to use. It will keep up to 1 week in refrigerator, in an airtight container.
The longer you simmer it the more condensed your broth will be.


chicken vegetable soup


For the Chicken Soup

4 cups of soup

Carrots, celery, zucchini, onion, chopped into bite size pieces
2 boneless, skinless chicken breasts cut into small pieces
Saute chicken, onion, carrots and celery
3 cups stock
1 cup boiling water
Bring to boil, turn down to simmer, add egg noodles and zucchini
Add fresh chopped parsley and sweet baby peas at the end of cooking 
Add salt and pepper if necessary
Serve

9 Grain Molasses Bread


After the guys ate all of yesterdays bread, I thought I'd explore another type of bread.  This recipe is a compilation of several recipes.  I have taken 2 different recipes from my Mom's old recipe box (she passed away over 20 years ago), and an old recipe I had clipped and saved called "Mennonite Bread".  Where any of these recipes came from is anyone's guess.  What I came up with is a nice flavoured, dense, soft textured bread with a crusty outside, yummy inside.

Ingredients:

41/2 cups boiling water
2 c 9 grain cereal ( I used Bob's Red Hill )
1/2 cup wheat bran
1/2 c Chia seeds
1/4 c psylium husks (Optional)
1/2 c flax seeds
1 c unsalted sunflower seeds
1/2 c molasses
4 tbsp Vegetable oil  (I used 2 tbsp coconut oil and 2 vegetable)
1 tbsp salt
1 1/2 c dried skim milk powder
2 tsp honey
1 cup lukewarm water
2tbsp dry yeast
9 1/2 cups flour  I used all purpose because I didn't have whole wheat I would have preferred using the whole wheat but you make do with what you have.

Instructions:


  1. Pour boiling water over grains leave until lukewarm
  2. Measure out your salt, oil, molasses, skim milk powder set aside while grains are cooling
  3. Dissolve honey into lukewarm water, sprinkle yeast over the top of the water
  4. Leave yeast mixture to sit until a foam has formed on top of water  DON'T stir the yeast mixture
  5. When grains are lukewarm add salt oil molasses mixture
  6. Then add the yeast mixture
  7. Lightly stir in the yeast and molasses mixture
  8. Start adding your flour 1 cup at a time, stir until each additional cup is mixed in
  9. When you are adding the 7th cup it will be getting hard to stir your dough will still be quite moist, just thick.
  10. Pour the 8th cup on your table then place your bread dough onto the flour on your table.
  11. Knead your dough until flour is absorbed dough will still be quite soft
  12. Repeat this process until you have incorporated all of the remaining  flour


Proofing and Baking Instructions:

1.Place the dough in a well buttered large bowl, rub a small amount of oil over the top of your dough cover with a clean tea towel and set your bowl in a warm place to let the bread rise, until it is double in size.  This will take about 1 hour.

2.Remove bread from bowl cut dough into 4 equal pieces, form your loaves I chose to make 2 rustic round loaves, and 2 elongated loaves.  Oil the top of each loaf and cover for another hour.

3.When you are ready to bake your bread make slashes across the top of your loaves, give them a slight brushing with egg wash and some oil then sprinkle some extra sunflower seeds over top.

4.Bake at 400 for aprox 40 minutes.  I used the method of heating my cast iron baking dishes for 25 minutes prior to putting my bread in the pan, and cooking them with a cast iron lid on the pans  This method gives them a crusty bottom and top but a nice moist center.  Much the same way French bread is cooked with  hot oven and the sprinkling of water; the steam forms in the cast iron keeping the bread moist but the crust forms nice and crunchy on the outside.


Blackened Jamaican Jerk Cod open face sandwich  with steamed vegetables
 Serves 4

4 pieces of cod fillet
Epicure Jamaican Jerk spice
Salt and pepper
1 1/2 tbsp coconut oil
Hot cast iron griddle heated in the oven

Brush the cod pieces with the oil, rub the salt pepper and jerk spice into the cod on both sides of each fillet.
Let sit for about 10 to 15 minutes

Preparation Timeline 

1.Prepare your vegetables:
I used baby Bock Choy and Brocolini   ( on the west coast at this time of year, they are fairly inexpensive because they can still be grown locally  so they are some of the cheapest vegetables to eat during the winter months.) 
2.Wash place in steamer 
3.Slice bread
4. Start cooking Cod on a griddle in the oven, this will take aprox.
   5 to 8 min per side depending on the size of your cod fillets
5.Put bread in toaster
6.Start to steam your vegetables in microwave total cooking time aprox 21/2 minutes
7.Slice tomatoes and lettuce 
8.Butter toast
9.Place mayo on toast
10. Lettuce and tomatoes 
11.Vegetables should be cooked, give them a sprinkle of
     Ponzu Sauce  ( a lighter sodium Citrus Soy Sauce, sodium count         in Ponzu is 17% where regular Soy Sauce is 48%) and a spritz of melted butter.


Well I am going to sign off, weight is still yo-yoing around the 140 mark, but I am not gaining just daily fluctuation of 1/2 lb or so.  But I truly have to make this pudge budge.  My daughter has just become engaged, and I am darned if I will be at that wedding wearing my fat lady suit.  So with that joyful event to look forward to, I am more determined than ever.

Here is today's giggle

                  DINNER IDEA!!  HAHA!!


Monday 11 February 2013

From flour, sugar, yeast, you get heaven on earth mmm.. yummy hard to talk mouth is full...

Written by Linda Gauthier and Recipe from Loretta Lablanc

I recently heard from my cousin Loretta, they have 2 feet of snow at the ranch right now, and she is hoping for an early spring.
I stand here in my Victoria kitchen, wondering what it would feel like to have snow on the ground, looking across at the neighbor's yard and spot Snow Drops coming up.

I sometimes feel that I'd like to be living where they get snow, but then again, right now I am planning what plants I will be able to set out in the garden, which leads me to decide that I think I'd just as soon live vicariously through my daughter and cousin when it comes to snow.  It is beautiful when the world is blanketed in a snowy layer, and the boughs of the trees reach down with their heavy winter cover, and everything is sparkling and clean, but then I think about driving in it and give my head a shake, I live in Victoria where people in general are hopeless in the snow.

Loretta sent me a recipe for one of her favorite breads, "Country Rustic Bread", it looks awesome!  I can't wait to try it, in fact I think I will try it out this afternoon.  She loves the smell and satisfaction of baking fresh homemade bread as I do.  Creating a beautiful loaf of bread is comforting and very therapeutic.  I started baking bread when I was around eleven or twelve, so for me it identifies with the immense pleasure of putting such simple ingredients together and ending up with such a delicious, soul satisfying product.  The smell of fresh baked bread, the taste of warm melting butter is such a basic pleasure that warms your soul and in many cases takes us back to being a child again when things were simple and easy.


Here is my Basic White Bread Recipe I have used for so many years.  I have no idea where it came from.

White Bread

Makes 4 loaves

1 tsp sugar
1/2 c lukewarm water
1 1/2 tbsp yeast
2 cups hot water
3 tbsp sugar
1tbsp salt
3 tsp lard
2c cold water
11 c all purpose flour

Directions:

Dissolve 1 tsp sugar in the lukewarm water, add the yeast.
Let stand 10 min
Dissolve 3tbsp sugar, salt and lard in the 2 cups of hot water
Add the cold water until the mixture is lukewarm
Stir in the dissolved yeast and 7 cups of the flour
Let stand for 15 minutes
Add 4 more cups of flour and work until a soft dough, not sticky
Don't be afraid to knead well
Let it stand in a warm place covered,
In the bowl for 11/2 hours or until double in size
Work dough down
Let stand one hour
Divide into 4 loaves, place in well buttered pans
Let stand until risen and then bake at 350 for 30 minutes or until brown and sound hollow when you tap it.

As I said, this is my basic bread recipe and I also use it for Cinnamon Buns.


For 3 loaves of bread and 1 pan of cinnamon buns, take 1 of the loaves roll out then spread the filling over the bread dough.  I use
1/2 cup melted butter
1 cup brown sugar
2 tbsp cinnamon
butter a 9" square baking pan
Drizzle maple sugar syrup over bottom of 9" square pan

Mix cinnamon, brown sugar, and melted butter together, sprinkle over bread dough, leaving 1" uncovered on long edge of bread dough.

IMG_6536


Roll from the far edge towards the edge with the 1" edge

IMG_6544


Slice and place in baking dish
Let rise again
Bake in preheated oven of 375 for approximately 30 min


Loretta's recipe for Artisan Bread, try it, it sounds yummy.


County Style Rustic Bread

I love any kind of bread. I love baking bread. It is so basic, with just a few ingredients magic happens. Nothing compares to the smell of just baked bread. For years, I have been baking Artisan Bread in 5 Minutes  By Jeff Hertzberg and Zoë François. More recently I tried Jim Lahey’s rustic bread recipes. Both are no knead and require a long rise, up to 18 hrs. I love both of these methods and will continue to make them but as usual I just had to see what would happen if I wanted bread now, not tomorrow. This bread. Crusty outside, chewy inside, home baked bread.

You will require a heavy cast iron dutch oven
2 ½ tsp instant yeast
3 ½ c. unbleached flour
2 tsp sea salt
2 tsp sugar
1 1/3 c. warm water
Add all dry ingredients in mixer with dough hook. Stir in water and continue mixing until a dough ball forms, pulling away from side of bowl and sticking to itself.  Knead the dough in mixer for 3-4 minutes. Then place the dough ball in a large bowl that has been lightly coated with oil, cover with plastic wrap, and allow to rise for 1 hr (until doubled in size). Sprinkle a large piece of parchment paper with flour. Using well floured hands, dump out dough and shape and tuck into a rough ball. You can also fold it over a couple times on a well-floured surface. It doesn’t have to be perfect; just keep tucking the dough underneath until you have a semi-smooth dough ball and place in middle of parchment paper. Cover with towel. Put your cast iron pot with lid on in oven @ 425f for 20 min.  Slash the top of your bread when ready to bake. Don’t be wimpy. Make several deep slashes any design. Be very careful and remove HOT POT. Place parchment and dough in pot, replace lid and into the oven for 30 min. Remove lid and continue to bake 10 more min. Please let bread cool before cutting. Then go find the butter.


I will be talking to you again in the next couple of days.  Enjoy the small things in life and laugh, laugh all the time.  It is the best medicine.

Lol...


The inner wild woman wants out........


Written  by Linda Gauthier


  These tough lookin chicks are the       
Biker Chicks
Biker Chicks
         

So if you are a biker chick at heart, no matter what your age, you still retain those inner urges.  Rockin music, greasy food and bad boys that steal your heart.  Well, this old biker chick feels like Rockin music, and having a good time with some bar food, beer and her bad boy, so how do I do this and remain on my diet?  I can't exactly deny myself all pleasures in life for the pursuit of a healthy body, can I?  Well maybe I could, but the "Biker Chick" won't be happy, so I am letting the wild woman out for the weekend, but she has only a day pass, not a week, or a month of freedom.  This is, as I see it, a prep course for the rest of my life.  The biker chick had her way for many years, and I have kept her contained for the past 6 months, so I am allowing her a day pass and no guilt, but I am also doing it in a healthy way.   

Menu today  (to serve 5 people)


Chicken wings 2 ways, Hot and Spicy and Herbed.
Dips Citrus Chipotle Ketchup and Honey Mustard
Zuchini Strips baked,
French Fries,
Green Salad
The Beer Yumm!!   Innis & Gunn a real treat.
    

Chicken Wings Hot and Spicy

Hot and Spicy 


Yields 3-4 servings

INGREDIENTS:

2 pounds chicken wings
2 tablespoons olive oil
2 cups Panko crumbs
2 tsp brown sugar
1 tsp onion powder
2 tsp garlic powder
2 tsp chili powder
2 tsp smoked paprika
1 tsp Sirachia Hot Sauce

DIRECTIONS:

Preheat the oven to 425 degrees F. Line a baking sheet with foil.

In a large bowl, combine the wings, Panko crumbs olive oil, brown sugar, onion powder, garlic powder, chili powder, paprika, salt and pepper and the Sirachia Hot Sauce

Place the wings onto prepared baking sheet and bake for 25 minutes, using metal tongs to turn at halftime.

Serve wings immediately with dipping sauce.


Herbed Chicken Wings.

2 pounds chicken wings

2 tablespoons olive oil
2 cups Panko crumbs
2 tsp brown sugar
1 tsp onion powder
2 tsp garlic powder
2 tsp Epicure 3 onion Dip Mix
2 tsp Epicure Herb and Garlic Dip Mix


Dips:
Chipotle Citrus Dip

11/2 tbsp Epicure Citrus Chipotle Ketchup mix
1/2 c Greek Yogurt Non-Fat 
2 tbsp low fat mayo 
1 tbsp ketchup


Herb and Garlic Dip

1 1/2 Epicure Herb and Garlic Dip Mix
1/2 c Greek Yogurt Non-Fat
2 tbsp low-fat mayonnaise


Baked Zucchini Sticks

2 small zucchini cut into sticks, first cut it in 1/4's, then 1/8's,

then cut the strips into 1/3's.
1 egg beaten
Panko crumbs mixed with 1/4 cup chicken shake and bake
Epicure Herb and Garlic

Directions

Pre-heat oven to 400 degrees

Mix Panko crumbs, shake and bake, and the herbs together 
place on a plate or into pie pan
Dip Zucchini Sticks into egg mixture
Roll and press into crumbs
Double dip again into egg mixture, then back into crumbs 
Bake until crispy on outside it will be aprox 20 min 


Rosemary and Garlic Oven Fries 


Epicure's Cajun Oven Fries


Prep Time: 5 minutes
Cook Time: 35 - 40 minutes

Ingredients

4 medium potatoes
1 Tbsp (15 ml) oil
1 Tbsp (15 ml) Epicure's Seasoning for Rosemary Garlic Oven Fries


Instructions

1. Preheat oven to 375° F (190° C). Cut potatoes into 8 - 10 wedges. Place in a bowl with 1 Tbsp (15 ml) each Epicure's Seasoning for Rosemary Garlic Oven Fries and oil, tossing to coat.
Place potatoes in a single layer on Epicure's Crisper. Bake for 35-40 minutes. 

The beverage


Now that I have had my weekend of non diet food, it is now time to get back on the the good behavior train.


So ... 


Its zumba time :)


Smile, don't take yourself too seriously, and let the wild woman out once in a while you will be happy you did.  I hope you have a good day and I'll talk to you soon.